Added:
26 Nov 2017
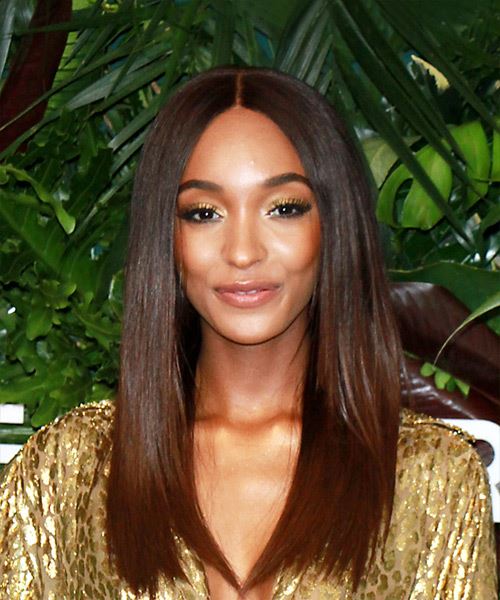
This thick mane has been straightened and then brushed through and worn in front of the shoulders, showing off the layers dressed through the mid-lengths to ends. This look is easy to re-create with the right tools and needs product to tame fly-away hair. Styling time can vary depending on the thickness of the hair.
Jourdan Dunn looks fabulous here in long, silky tresses. Jourdan is a fan of simple hairstyles, both long and short, which are ideal for her oval-shaped face and thick hair type. The subtle layers in the ends give her hair an infusion of body and volume which is essential for a long face-framing style. The center part and grown out fringe also works well with her high, rounded hairline. Sweeping the hair in front of the shoulders is an easy way to add some extra style to a simple long ‘do like this one, plus it highlights her gorgeous cheekbones, collarbone and defined jawline. Her subtle ombre hair color is also highlighted with this look.
Jourdan has a medium-warm complexion and dark eyes which makes her suited to dark brown and black hair the best. Here, she maintains a monotone rich espresso chocolate shade throughout the lengths, while the ends are lightened to a vibrant auburn tone. This gives her hair a sleek, healthy look, plus it brightens up her complexion and eye color. The simplicity of her haircuts keeps all the focus on her hair color here, which makes her strands look shiny and healthy.
Jourdan Sherise Dunn is an English fashion model and actress. She was discovered in Hammersmith Primark in 2006 and signed to Storm Model Management in London shortly thereafter. She began appearing on international runways in early 2007.
Jourdan Dunn Long Straight Brunette and Auburn Two-Tone Hairstyle
Hairstyle Suitability Rating:
Hairstyle Popularity Rating: ★★★★★
Hairstyle Popularity Rating: ★★★★★
Hairstyle Type
Category
Formal
Length
Long
Elasticity
Straight
Hair Color
Brunette and Auburn Two-Tone
Haircut Technique
Type
Scissor Cut
Suitability
Gender
Women
Face Shape
round,oval,heart,diamond,triangular
Hair Density
Thick
Hair Texture
Medium
Age
Under 21, 21 - 30, 31 - 40, 41 - 50, and 51 - 60
Height
Any
Weight
Thin/Average/Large
Forehead Height
Long
Glasses
Yes
Styling
Time
20 minutes
Tip
Use a flat iron after blow-drying for best results.
Products
moisturizer, smoothing shine, hair spray
Tools
blow dry, straightening iron
Similar hairstyles you may be interested in...

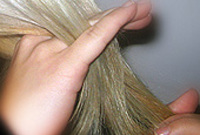
Apply a small amount of hair moisturizer to the palm of your hand and distribute it evenly through the mid-lengths and the ends. Moisturizer will help your hair to maintain good condition and protect your strands from heat as you style.
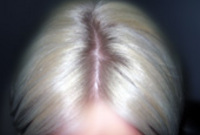
Using the corner of your comb and standing in front of a mirror find the middle of your nose and then drag the comb straight up slowly until you reach your hairline and then continue back in a straight manner to achieve an even middle part. A middle part is a great way to make small, round face shapes appear longer and thinner.
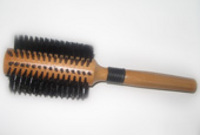
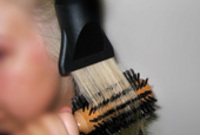
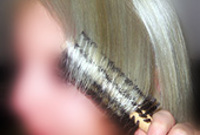
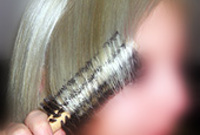
A large radial brush is usually used on long straight hair types or to smooth out wavy or curly hair textures. When selecting a radial brush, always use one with a pure bristle as this will not tear or damage the hair.
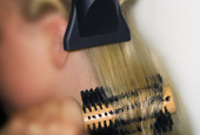
Using your brush, blow-dry in small sections starting from the nape/back. Tilting your head forward, place the brush an inch below the roots to hold them taut and aim the dryer above the brush for a few seconds before continuing to the ends.
Using your brush, blow-dry in small sections starting from the sides. Tilting your head forward, place the brush an inch below the roots to hold them taut and aim the dryer above the brush for a few seconds before continuing to the ends. Repeat this step on a new section directly above the dry one.
To blow-dry the crown/top sections, take a section of hair no bigger than the diameter of the brush and blow-dry the hair placing the brush under the section of hair. With your blow-dryer in front of the brush, follow the brush in an upwards direction at the roots and an outwards position at the ends for volume and softness. Continue until the section is dry.
Take a section of your hair from your ear to your temple the same diameter as the brush. Place your brush underneath the hair starting at the roots and pull the hair slowly in a forward and downward direction with your blow-dryer above. Be sure the section is dry and then repeat the step on a new section of hair directly above.
Take a section of your hair from your ear to your temple that is the same diameter as the brush. Place your brush underneath the hair starting at the roots and pull the hair slowly in a forward and downward direction with your blow-dryer above. Be sure the section is dry and then repeat the step on a new section of hair directly above.
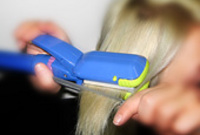
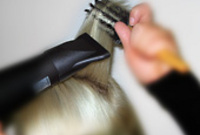
When straightening your hair, first make sure that your hair is completely dry. Then, section your hair off starting from the back/nape using a comb. Straighten your hair starting from the roots and working your way down to the ends using your comb as your guide. Make sure not to leave the straightening iron in one spot for more than 3 seconds. For more information about straightening techniques click here.
Apply a very small amount of smoothing shine to the palms of your hands and then run it through the mid-lengths and ends of your hair. Be careful not to add any to the roots or a large amount to any section of the hair as smoothing shine can be very heavy on the hair, weighing it down and making it appear oily.
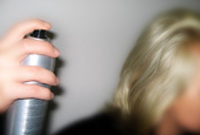
To finish, apply a minimal amount of hairspray from an arms length distance to the top, sides and back. Take care not to use too much or you will end up with a white, flaky residue which looks like dandruff.

