
Added:
30 Jul 2018
Goldie Hawn is a bubbly beauty who looks smoking hot at any age. But let’s not forget about one of her best assets that helps her look eternally youthful—that haircut! Goldie has worn this cut forever. Why? Because it flatters her, and it covers half of her face. If you can stand having your fringe in your eyes then you too can hide the signs of aging with your hair. This is a sexy and sassy look for Goldie. Short piecey layers have been cut throughout her hair to create shape and definition. Piecey bangs have also been added to enhance her facial features. This is an easy style to maintain with regular trims. Here’s how:
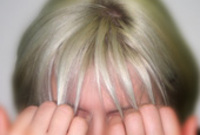
First, you have to grow out your hair. Get rid of that sensible short haircut and grow it past your shoulders. Then go to your hairstylist and ask for a full fringe that sits just above your cheekbones. And don’t let your stylist give you one of those wimpy, wispy fringes either! This has to be full-on thick bangs, Goldie-style. Add lots of layers throughout your hair and you are set.
Here’s how to style it:
- Add a root booster before you blow-dry it to get full volume in the crown area.
- Use a round brush or large rollers to add body throughout your layers.
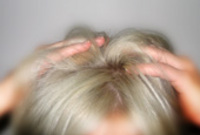
- Backcomb the roots and tousle your hair up a bit. The idea is to get lots of lift around the top of the head, and have your bangs sit casually. We don’t need a polished look here.
- Add some finishing spray to hold your new Hawn-inspired hairstyle.
Goldie Hawn Long Straight Hairstyle
Hairstyle Suitability Rating:
Hairstyle Popularity Rating: ★★★★★
Hairstyle Popularity Rating: ★★★★★
Hairstyle Type
Category
Casual
Length
Long
Elasticity
Straight
Haircut Technique
Type
Suitability
Gender
Women
Face Shape
round,oval,heart,triangular
Hair Density
Thin/Medium
Hair Texture
Fine/Medium
Age
Under 21, 21 - 30, 31 - 40, 41 - 50, 51 - 60, and Over 60
Height
Any
Weight
Thin/Average
Forehead Height
Short/Average
Neck Length
Long
Ears
Small/Average
Nose
Small/Average
Glasses
No
Styling
Time
30 minutes
Tip
Pinch and twist your ends out with the wax to create this simple flick.
Products
gel spray, mousse, wax, hair spray
Tools
blow dry
Similar hairstyles you may be interested in...
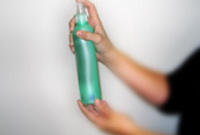
Hold the gel spray no closer than 3 inches from your hair and then evenly mist the gel spray into the roots to create a stronger hold style. Gel spray will hold well and will not look wet or weigh the hair down. Using your gel spray in this fashion will create added hold and a longer lasting style.
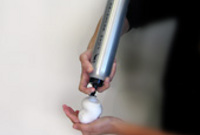
Apply styling mousse to damp hair, using your palm as a measuring guide, and evenly distribute it along the hair shaft. Styling mousse will add hold and can help achieve better results.
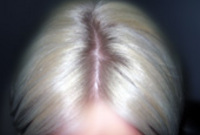
Using the corner of your comb and standing in front of a mirror find the middle of your nose and then drag the comb straight up slowly until you reach your hairline and then continue back in a straight manner to achieve an even middle part. A middle part is a great way to make small, round face shapes appear longer and thinner.
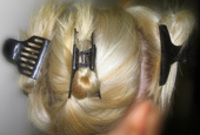
It is always a good idea to work in sections. This will help to make your hair styling quicker, easier to follow and more orderly. Comb your hair out and place your hair up into four equal sections, two in front and two in back, starting from ear to ear.
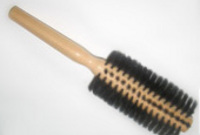
A medium radial brush is used on medium to long hair types to smooth out wavy or curly hair textures or to add body to straight hair. When selecting a radial brush, always use one with a pure bristle as this will not tear or damage the hair.
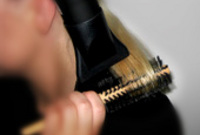
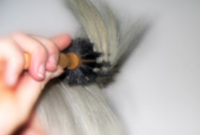
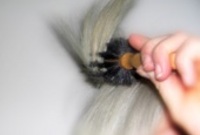
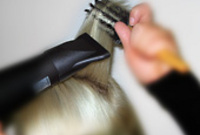
To blow-dry under, start at the nape/back and place your brush under the section of hair close to the nape. With the dryer held up over the hair, pull the brush from the roots and continue to the mid length's, keeping the blow-dryer following over the top. Once you reach the ends, curve them under. Repeat this step until the section is completely dry.

To blow-dry the sides, take out a small section of hair from the front and clip the rest of the hair away. Next, place the brush under the section and then pull the brush and hair forward around your face (this curving motion creates body). Place the hair-dryer on top of the brush until you reach the ends and then turn the ends under. Repeat until dry.
Working in sections, place your brush at the roots of your hair and then using a blow-dryer on low heat, drag your brush through to the ends styling towards the left.
Working in sections, place your brush at the roots of your hair and then using a blow-dryer on low heat, drag your brush through to the ends styling towards the right.
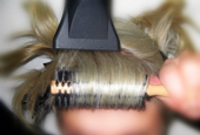
To blow-dry the crown/top sections, take a section of hair no bigger than the diameter of the brush and blow-dry the hair placing the brush under the section of hair. With your blow-dryer in front of the brush, follow the brush in an upwards direction at the roots and an outwards position at the ends for volume and softness. Continue until the section is dry.
When blow-drying your bangs forward, clip your hair back leaving only your bangs out. Position your bangs evenly in your brush, taking the hair in a forward direction. Blow-dry from roots to ends, keeping the tension consistent, and evenly distribute heat over the whole section of hair that you are working on. Repeat until the hair is dry. This will stop any frizz that may occur.
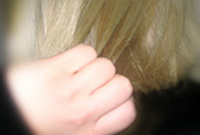
Apply some wax to your fingertips and then pull through the ends of your hair in a downward motion to achieve a sculptured look. Pinch clumps of hair in different directions for a messier result.
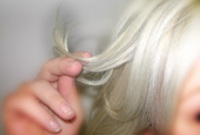
Apply a small amount of wax to your fingertips, and then starting about halfway down the hair shaft, pinch and drag the hair in a downward motion before flicking the ends out. Remember not to apply too much wax as it will weigh your hair down.
Apply some hard wax to your fingertips and then rub it into your roots while lifting your strands for soft volume.
Apply a small amount of wax to your fingertips, and then using your fingers, rake through your bangs pinching the ends as you go to create a feathered, textured effect.
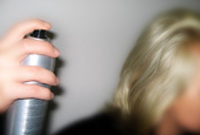
To finish, apply a minimal amount of hairspray from an arms length distance to the top, sides and back. Take care not to use too much or you will end up with a white, flaky residue which looks like dandruff.

